Showing posts with label Recipes. Show all posts

February 28, 2013

Batch Cooking - Breakfast Burritos

I love batch cooking. There's just something about opening up your freezer and seeing all these pre-made meals just waiting to be used for a night your busy or just plain don't feel like cooking. Since DJ travels for work he is always looking for something different to pack with him. He needs something simple that doesn't require any prep and can be warmed in a microwave or eaten cold. It's hard to find something healthy (or somewhat healthy) that falls into this category. I decided breakfast burritos would be perfect for him to take over the road with him. He can heat them on the train in the tin-foil or he can pop them in a microwave when he's at the hotel. The burritos will be great for Taylor and I when we're at home too.    

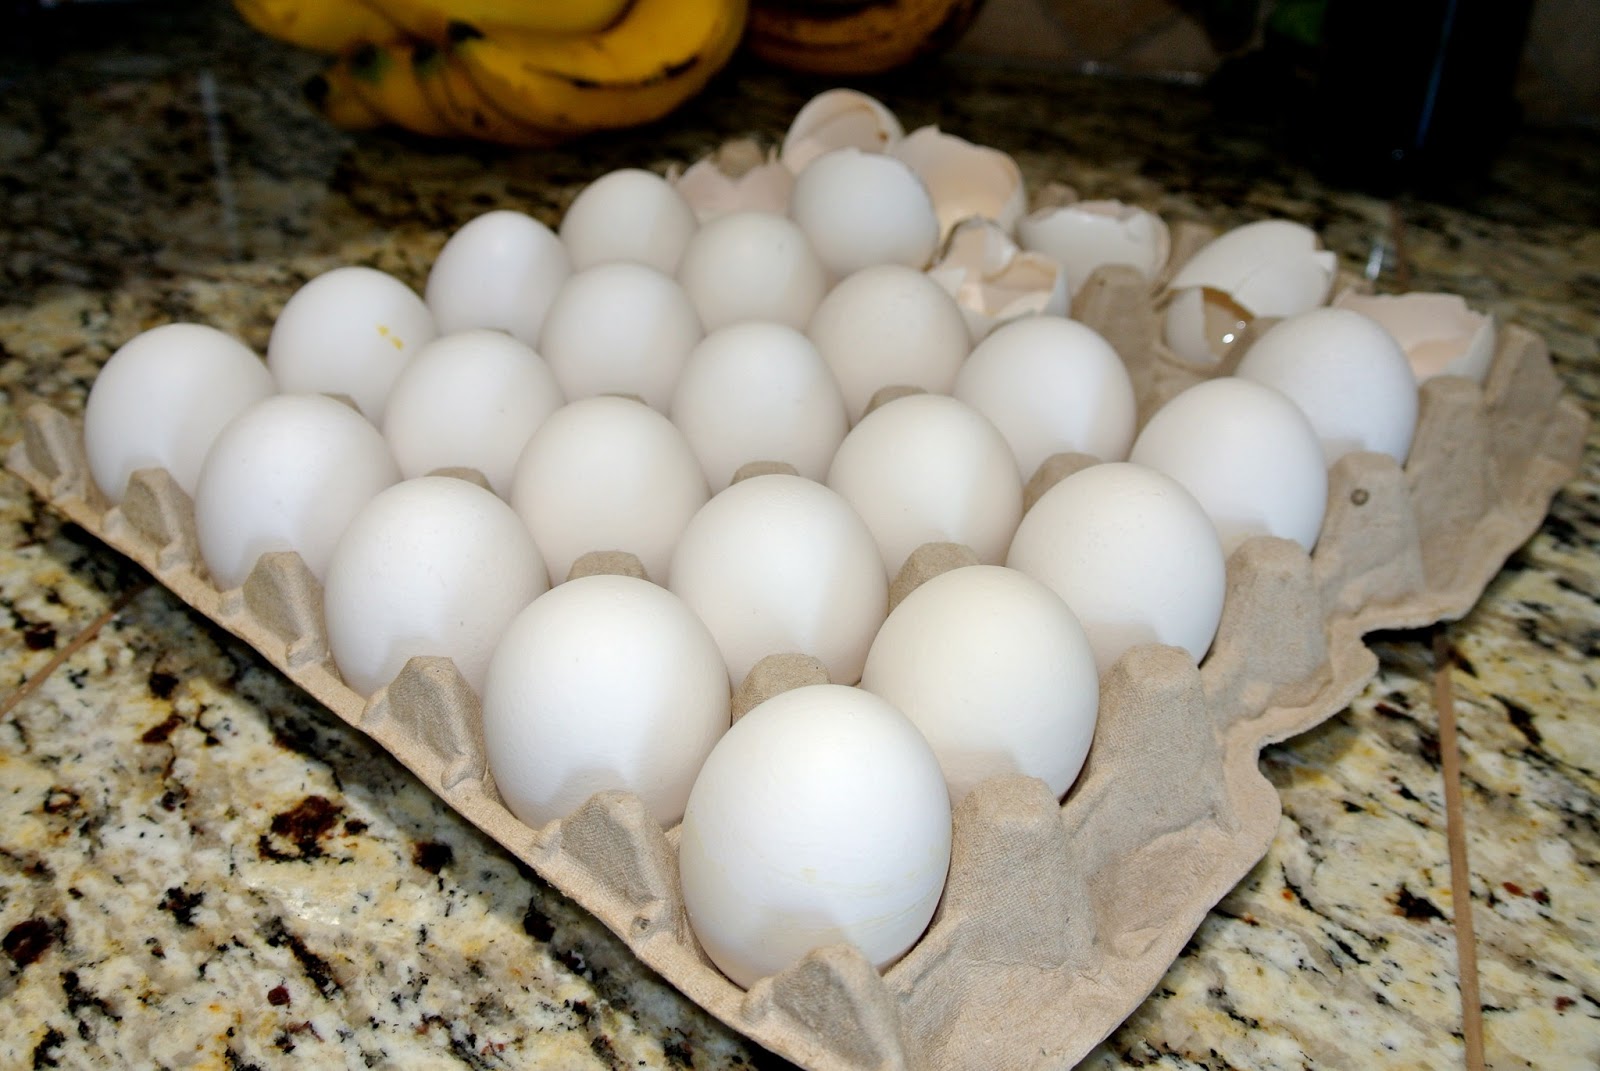
When you're doing batch cooking it's so much easier to buy things in bulk so we stopped at Sam's Club. I bought tortillas, shredded cheese, and a large fully-cooked ham. We always buy our eggs in large amounts because we go through them quickly with all the baking and cooking we do around here.

I started with the potatoes. I left the peel on so after scrubbing them clean I cut them into bite sized pieces. I used about 6 large potatoes but you could always use more or less depending on how many burritos your making.

Put them in a pan with a tbsp of olive oil, pepper, salt, and a little garlic powder. Toss them around for a few minutes over medium-high heat then cover and let cook for 10-15 minutes until tender. I cooked the potatoes in batches so they would cook evenly.

While the potatoes cooked I worked on the eggs. I just made the eggs the same way I would if I were making scrambled eggs. Yes, I used all these eggs (you can see I didn't think of taking a picture until I had already began cracking them).
While the potatoes and eggs were cooking I prepped the rest of the ingredients. I bought a fully-cooked spiral cut ham and just cut it into bite sized pieces. I didn't use the entire ham so I'll use the rest for sandwiches or another meal. 

I've never made green chili before and wasn't about to try just to make breakfast burritos so I bought a quart of green chili from Santiago's. Once everything was ready I set up a little assembly line and got to work. 

I started with a tortilla (obviously) and used tin foil a little bigger than the size of the tortilla.

Add eggs,

Potatoes,

Ham,

Cheese,

green chili,
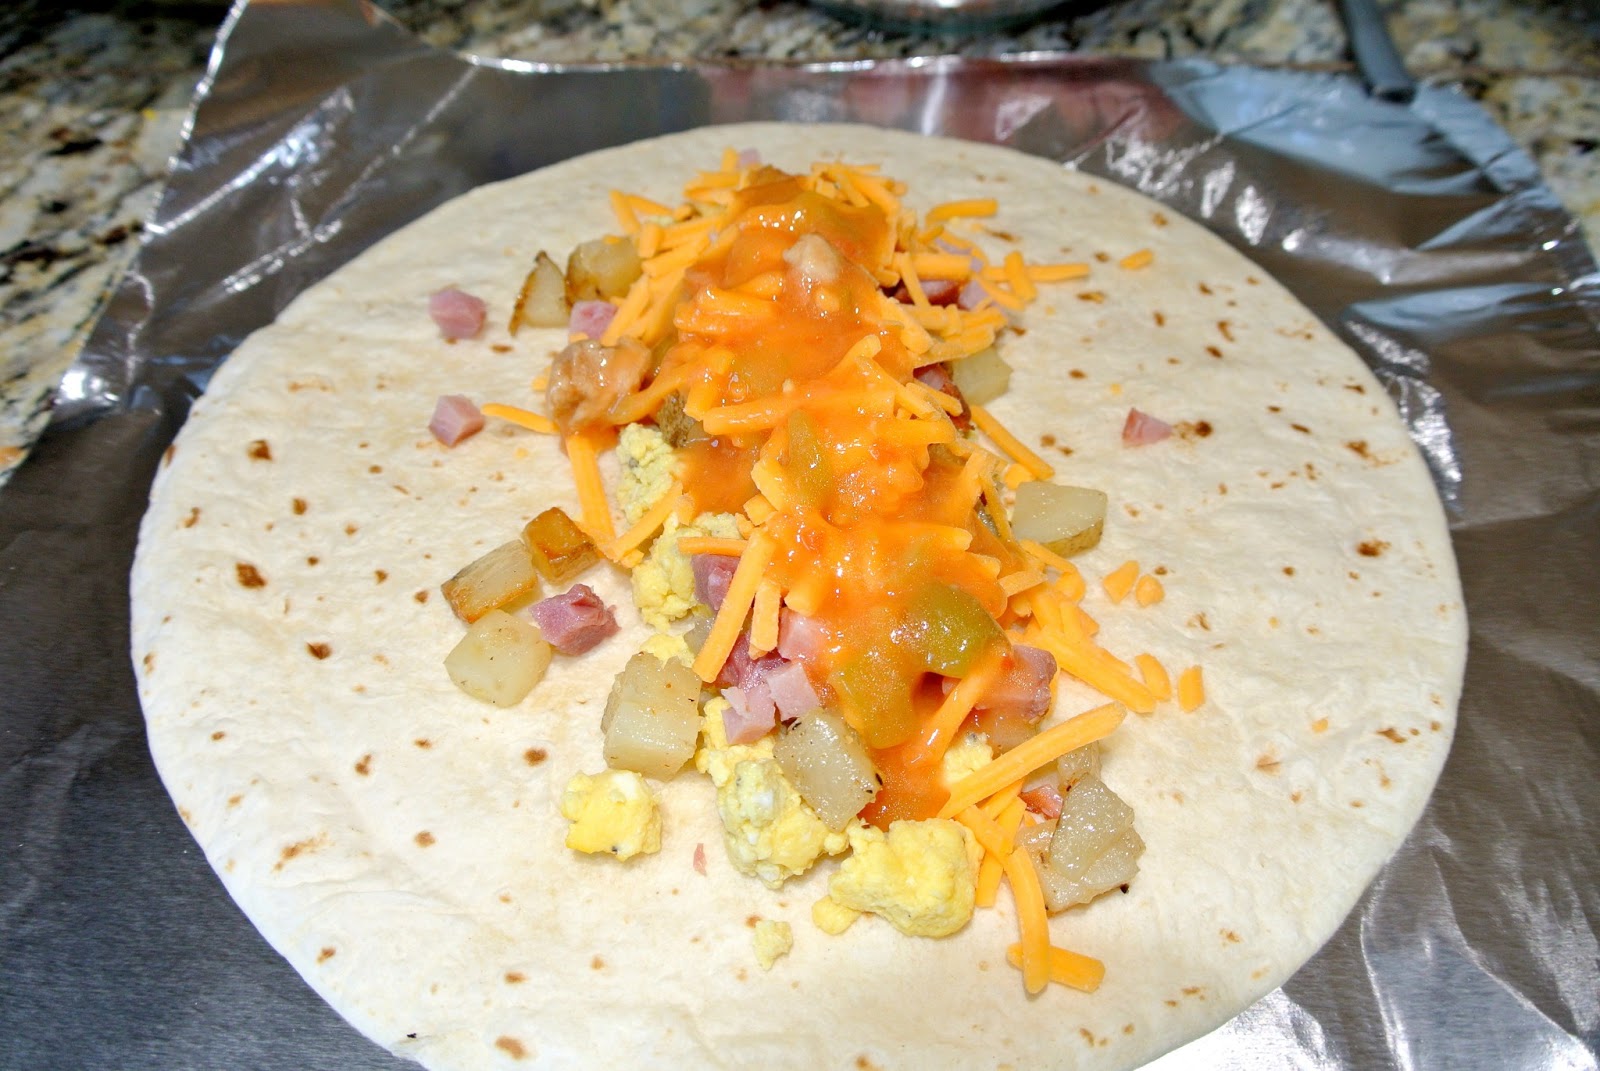
And roll

I ended up with 22 breakfast burritos. I thought it was so weird that each pack of tortillas only had 11. Why not make it 10? or 12? Strange. I started rolling the burritos like you would a normal burrito but realized that wouldn't be very easy for DJ. They needed to be convenient if he's on the train when eating it. I rolled them up like tootsie rolls so he could just twist the tin foil off and eat it. 

I put the burritos in zip lock bags to store nicely in the freezer - 5 per bag. I kept two out in the fridge so DJ could take them with him today. 

You can make these any which way you'd like. And that's what I liked about them. Add as little or as much of any ingredient you'd like. They didn't take very long either - about an hour and a half start to finish, including cleaning up. I think these would be great to take for our next camping trip too! Yummy - batch cooking at it's finest!

February 15, 2013

Peanut Butter & Jelly Cookies

Last year for Valentine's Day I had written this on chalk board:

You are the Peanut Butter to my Jelly
Water to my Ocean
Glaze on my Donut
Spring in my Step
Twinkle in my Eye
Blue in my Sky
Cherry on my Sundae
Flip to my Flop
Milk to my Cookie
Sweet in my Dreams
Beat of my Heart
Best to my Friend
Love of my Life

Then over the summer our friend Tara made some amazing peanut butter and jelly cookies. We haven't had them since then and DJ kept telling me I should try to make them. What better time to do it than Valentine's Day? I made that my theme this year and for making these cookies for the first time they turned out very well if I do say so myself. So I thought I'd share the recipe with you all.

Peanut Butter and Jelly Cookies

Ingredients

1 1/2 cups all-purpose flour
1 1/2 teaspoons baking powder
1/4 teaspoon salt
1 stick unsalted butter, room temperature
1/2 cup granulated sugar
1/2 cup packed light-brown sugar
1 cup creamy peanut butter
1 large egg
1/3 cup jelly (your choice of flavor), stirred to loosen

Directions:
In a large mixing bowl whisk together flour, baking powder, and 1/4 teaspoon salt. In a second large bowl, beat butter and sugars with an electric mixer on medium speed until pale and fluffy. Beat in peanut butter, then egg. Reduce speed to low, and beat in flour mixture until dough forms. If dough is sticky, refrigerate for 5 to 10 minutes.

Preheat oven to 350 degrees. Roll dough into 1/2-inch balls (about 2 tablespoons each). Arrange on parchment-lined or greased baking sheet, spacing 1 1/2 inches apart. Using thumb or finger, lightly press an indentation into the center of each cookie. Refrigerate 20 minutes.

Bake for 12 minutes. Remove from oven and fill indentation of each with a generous 1/2 teaspoon full of jelly. Bake another 6 to 7 minutes are until cookies are firm.

Enjoy with someone you love!  

January 19, 2013

Cinnamon Bread Delight

I like baking dessert-type breads. Sometimes in the middle of the day while Taylor's taking a nap there's nothing better than curling up on the couch with a cup of coffee, a slice of sweet bread and a good book or magazine. It makes for some nice Mommy time. 

A favorite bread of mine to make is Cinnamon Bread Delight. I got the recipe from my amazing Aunt. Thanks Aunt Nancy! I still love traditional breads like Banana Nut Bread but I don't always have overripe bananas or nuts on hand. This bread is simple enough that everything is almost always in my cupboard or pantry. Another bonus with this bread is that it makes two loaves so it's easy to give to a nice neighbor, friend or you can freeze it for later.


Cinnamon Bread Delight


 3 cups flour
 2 cups sugar
1 1.5oz. pckg. instant vanilla pudding mix
½ tsp. baking soda
1 ½ tsp. baking powder
½ tsp. salt
2 tsp. cinnamon 
1 ½ cups milk
½ cup oil
½ cup applesauce
2 eggs, beaten
1 tsp. vanilla
2 tbsp. cinnamon sugar

Preheat oven to 325. Grease 2 5x9 loaf pans. 
In a large bowl mix all dry ingredients except 2 tbsp cinnamon sugar.
In a separate bowl mix the milk, oil, applesauce, eggs and vanilla. Stir milk
mixture into flour mixture until
smooth.
Sprinkle the bottoms of the pans with cinnamon sugar and divide the batter
between the 2 loaf pans. 
Bake 1 hour or until a toothpick comes out clean.

Enjoy!


January 18, 2013

Blueberry Oatmeal Muffins

With DJ traveling all the time for work it's important for me to have food around the house that makes it easy for him to pack meals for on the go. Before his most recent trip I was searching my Pinterest pages for new yummy recipes. Man, I love that site! How did we live before it? :o)

I stumbled across this recipe. I had everything on hand for it so I thought it couldn't hurt to try. I have to say, these are a new favorite for me! Simple, easy and healthy! I love that the recipe doesn't require any flour!! And DJ even liked these!


Banana Oatmeal Cupcakes

Ingredients:
3 mashed bananas (the riper, the better)
1 cup vanilla Almond milk
2 eggs
1 tbsp Baking Powder
3 cups Old Fashion or Rolled Oats
1 tsp vanilla extract
6 oz fresh blueberries, chopped (the original recipe uses chocolate chips but I'm not a fan of chocolate chips in anything other than cookies so I switched it up)

Preheat oven to 375 degrees.
Mix all ingredients together except blueberries. Set aside while you prepare the muffin tins.
Stir blueberries into oatmeal mixture. Divide oatmeal mixture between all muffin tins (makes about 18).
Bake for 20-30 minutes. You'll see the edges just starting to brown and they will be firm to the touch. 

I'll be making more of these later :o)


July 21, 2012

Baking with Apples

I'm just about over this summer thing. I'm ready for cooler weather, jeans and long sleeve shirts, sipping on warm coffee while baking in the kitchen. I'm ready for fall. Don't get me wrong, I love summer - hanging out by the pool, warm summer nights, and fires in the back yard. But nothing beats having the windows open, feeling the crisp chill in the air and baking fall treats. Can you tell I'm a fall kind of a gal?

I'm already kicking into fall mode and my kitchen is a clear indicator of that. I'm not sure if there is a better smell than fresh baked apple pie.

With all the apples we got I wanted to learn how to make apple butter. I'd never made it before but it didn't seem too hard.

And let me tell you, this stuff is amazing! Our neighbor and I made 2 batches Wednesday night. Thursday afternoon I made another batch. I made enough to hand out to neighbors and friends, keep some in our fridge and freeze some for later. It's a process but totally worth it.


Apple Butter

Ingredients:
- 5 lbs. Tart Apples
- 2 cups apple cider

- 3-5 cups sugar
- 3 tsp. ground cinnamon
- ¾ tsp. ground cloves
- ½ tsp. ground allspice
- ½ tsp. ground nutmeg

Peel, core and quarter apples. In a large crock pot slowly cook apples in cider until tender. (I did this in a large pot on the stove because the crock pot took too long). Blend in a food processor or blender to the consistency of apple sauce.


Add 3 cups of sugar and check for sweetness; add more as necessary, sometimes up to 5 cups. (We only needed 3 cups) Add spices and stir together.


In same large crock pot cook on low for 6 to 8 hours (or overnight on low).


Test for thickness by spooning butter on a cold plate. It no liquid comes out of the edges, it is thick enough. If it isn’t thick enough, take the lid off the crock pot and turn it up to high. Let some liquid boil off, but stir and check back often.


Ladle into sterile jars leaving ¼ inch head space. Process in a boiling water bath for 10 minutes, adjusting for altitude if necessary. (I didn't can ours but it's something I want to try. You can easily let the apple butter cool and freeze in freezer bags).
**This recipe makes ten 1/2 –pints of butter.


October 23, 2010

Dinner

Since we got back from Mexico I have spent a lot of time in the kitchen. I have been ready for fall since the middle of the summer. DJ and I decided in Mexico that we would start eating better and not eating so much junk and snack foods. But of course, with fall comes the desire to be in a warm kitchen baking. It hasn't been good for our waist lines. Yes, we've had parties that I needed to take a dessert to and we've shared everything with family and friends so we technically haven't eaten all of it - it's still not good to have around. Since we've been back I have made 10 dozen chocolate chip cookies, 5 homemade cheese cakes, 3 pies, 5 loaves of bread, 3 dozen blueberry muffins, a batch of brownies, corn bread, rolls and biscuits. This could kill any one's waist!

So to combat the effects of my baking I've been trying to make dinner as healthy as possible. I've been trying some new recipes that are super easy, require only the ingredients I normally have in the pantry/fridge and don't require much time. So I decided to share a few.


Potato, Pepper & Italian Sausage Roast

Ingredients:
2 bell peppers (I did yellow and green)
1/2 sweet onion
1 pckg sweet Italian Sausage
To Taste:
Oregano, Basil, Parsley, Garlic, Salt & Pepper
Olive Oil

Wash and slice all veggies (quarter the potatoes)
Cook Italian sausage and place in bowl with veggies
Toss veggies and sausage with seasoning and olive oil
Place on cookie sheet and bake for 30 minutes at 400 degrees


Cheesy Ham & Pasta Bake

Ingredients:
1 pckg wheat penne pasta

2 cup shredded cheddar cheese
1 1/2 cup diced ham
1 small can cream of mushroom soup
1 cup milk
1/4 tsp pepper

Cook pasta according to package
Combine ham, milk, mushroom soup and 1 cup cheese in a 9x13" baking dish. Stir in pasta (I did all this in a large bowl because I had a little helper that wanted to stir - less messy)
Sprinkle remaining cheese over top of pasta.
Bake at 300 degrees for 15-20 minutes or until cheese melts

Enjoy!

August 17, 2010

Recipe Sharing

I got a new recipe the other day for a new salad and I was so excited to make it. Someone brought it to a get together we were at and I knew I wanted to have the recipe for our house. Today was the perfect day to make it too.

It's called a 7 Layer Salad but really anything you want can be added to it.

Most people wouldn't need to make as much as I did but I was feeding 4 (well 3 1/2 counting the size of Taylor's meals) but wanted left overs for DJ to take to work. I made it in a 13x9 glass cake pan but next time I will make it in a large tupper-ware dish so I can clean one less dish when cleaning up after dinner.

While I cut everything up I had someone picking at all the ingredients. . .


To start you just need to layer the bottom of the pan/dish/bowl with lettuce. I used pre-shredded lettuce because it saved me time. Next you add your favorite ingredient. I added peas. For this I just used frozen peas that had been thawed.


 After the 1st two layers the 'dressing' is added. Had I heard this before trying it I might not have ever eaten it. The dressing is Mayo. Yep, just plain Mayo. I used "light" Mayo because I felt less guilty. Sprinkle some sugar across the top of the Mayo.


Then you add anything you'd like. I ended up with a 12 layer salad. I used (in this order) lettuce, peas, mayo, carrots, onions, mushrooms, celery, green bell peppers, cucumbers, chicken, bacon, shredded Colby jack cheese and hard boiled eggs. It was so good!


 I wanted a little sweet flavor so I added raisins to my bowl. It's the type of salad that makes a perfect complete meal. You might also need to make it a couple of times for some trial and error runs. Everyone loved it here though.

October 26, 2009

Fav Fav Fav

THIS is possibly now my favorite site. . . This woman is amazing and I can already tell you that I will be testing out some of her stuff. Mine will not be as pretty, but I do plan on testing it :)

December 14, 2008

Cookies and More

Yesterday we did Christmas baking. We made Sugar Cookies (frosting and all), Red Velvet Cookies, Peanut Brittle, No Bake Cookies, Chocolate Covered Pretzels, Fudge (with and without nuts), Pecan Clusters, Candy Coated Nuts and more. It was an all day event and by the end of the day, Carrie, Grandma Judy, Taylor and I were worn out! Taylor did a lot of taste testing and supervising. She tasted her very first sprinkle! I held it on her tongue and she loved it.
Everything was so good I couldn't stop eating. And now we have a tray full of everything sitting on our kitchen counter. Let the Holiday eating begin!


Taylor is now 2 months old and DJ took her to her 2 month well-baby check up on Tuesday. She is such a big girl! She is 13 pound 9 ounces and 24 1/2 inches tall. She is such a happy baby.